
Streaming PC Setup: Start With Upload and Audio, Not Gear
To stream watchably as a beginner you need three things: a stable upload connection, clear audio, and a PC that can encode without choking. Everything else, from RGB lighting to a second monitor, is secondary. Before you buy anything, decide whether you're running one PC or two, then run a speed test tonight so you know what you're working with.
Key takeaways
- A stable upload connection and clear audio are critical for beginner streaming; hardware choices matter less than connection quality and mic clarity.
- Modern GPUs with dedicated encoders like NVENC or AMF provide nearly identical quality to software encoding while reducing CPU load, especially on current-generation cards.
- Most beginners should start with a single PC unless experiencing frequent overload warnings, as dual-PC setups are costly and only necessary for highly demanding streams.
- Audio upgrades, such as a USB or XLR mic with noise reduction and proper placement, deliver more viewer impact than camera or lighting improvements.
- For internet speeds below 720p streaming requirements, a wired connection or plan upgrade is essential before investing in additional hardware.
Table of Contents
- Essential components and minimum vs recommended specs
- Single-PC vs dual-PC setups and how capture works
- Peripherals and capture hardware that move the needle: mic, camera and lights
- Streaming software, encoder selection and recording formats
- Network and upload: test your connection and match bitrate
- Optimisation and troubleshooting: quick fixes that save performance
- PC Scientist checklist and how we can help
- Audio setup and acoustic treatment basics
- Stream interaction tools integration: chat, alerts and overlays
- Basic lighting positioning and setup for clear video
- Background setup or green screen use and setup
- Streaming platform choices and basics: Twitch, YouTube and more
- What we think beginners get wrong
- Book PC Scientist for setup, tuning or a custom streaming PC
- FAQ
- Sources
Essential components and minimum vs recommended specs
Your CPU matters most if you plan to use software encoding (x264), because that method leans on processor cores to compress video. A quad-core chip from the last few years can survive light streaming, but six or eight cores give you real breathing room when a game and OBS are both demanding attention. If that sounds like more than you want to manage, hardware encoding is the easier path for most beginners.
Your GPU carries the game and, increasingly, the encoding too. Modern graphics cards include dedicated encoder hardware such as NVENC, AMF or Quick Sync, and these offload the compression work from the CPU almost entirely. According to OBS Studio's hardware encoding guidance, hardware encoders now approach or match software encoding quality at common streaming bitrates, though earlier generations were noticeably weaker. Recent cards from AMD and Nvidia have added AV1 support and sharper encoding quality, so a current-generation card buys you better results for the same bitrate.
RAM is simpler: 8 gigabytes is the bare minimum, but 16 gigabytes is what we'd recommend for anyone running a game, OBS, a browser for chat and Discord at the same time. Windows and your apps eat into that 8 gigabytes faster than you'd expect, and running short on memory causes stutters that show up on screen.
Storage splits into two jobs. Put your operating system and games on an SSD, because load times and in-game stutter both improve. Add a second, larger drive (an SSD or a spinning hard drive) for recordings, since stream archives pile up quickly. On format: OBS Studio records to MKV by default because a recording stays recoverable even if the stream crashes mid-session, and you can remux that file to MP4 afterwards when you need it for uploading somewhere that expects that format.
Motherboard, power supply and cooling rarely make headlines, but they're where reliability lives. A motherboard with decent VRM cooling and a power supply with some headroom above your components' needs will keep a long stream stable instead of crashing three hours in. Case airflow or an after market cooler keeps your CPU from throttling under sustained load, which matters more during a two-hour stream than during a quick gaming session.
If you're working to a budget, prioritise in this order:
- Audio and internet first: a decent microphone and a tested, stable connection improve your stream more than any part swap.
- CPU and GPU next: these decide whether your stream looks smooth or stutters.
- Camera and lighting last: genuinely useful, but the smallest piece of the puzzle compared with the first two.
Single-PC vs dual-PC setups and how capture works
Most beginners should start with a single PC. It's cheaper, simpler to configure and perfectly capable of a smooth 1080p stream if your CPU or GPU encoder has spare capacity. The trade-off is that demanding games and encoding share the same hardware, so a graphically intensive title can push your system into overload.
A dual-PC setup splits the job: one machine runs the game, a second handles encoding and streaming software, communicating through a capture card. This removes almost all encoding pressure from your gaming PC and lets you run heavier games at higher settings while streaming at full quality. The investment only pays off once your single PC is genuinely struggling.
- Internal PCIe capture cards sit inside the second PC and offer the lowest latency, ideal if you're set on a permanent dual-PC rig.
- External USB or Thunderbolt capture devices are more flexible, work with laptops, and suit anyone who isn't ready to commit to a dedicated second tower.
- Simple USB capture adapters are the budget entry point, useful for capturing a console or a second source without full dual-PC complexity.
You probably need a second PC when your main machine shows consistent "encoding overloaded" warnings during demanding games, when frame drops appear even after you've tried software fixes, or when you want to stream at settings your single PC simply can't sustain alongside the game itself.
Peripherals and capture hardware that move the needle: mic, camera and lights
Audio is the upgrade viewers notice first. Officeworks' beginner streaming guide points out that audio quality is often the most overlooked but highest-impact upgrade, since a decent microphone makes a stream feel professional even when everything else is basic. A USB microphone plugs straight in and suits most beginners, while an XLR microphone paired with an audio interface gives you more control over gain and tone, at the cost of extra setup and cost.
Your webcam matters less than people assume. A clean, well-lit 720p image beats a noisy, poorly lit 4K one every time, so fix your lighting before you spend money on a camera upgrade. When you do upgrade, frame yourself so your eyes sit roughly a third of the way down the shot, leaving headroom instead of cutting off your forehead.
For lighting, one soft key light angled slightly above and in front of your face removes harsh shadows without needing a full three-point setup. Avoid lighting yourself from directly overhead or from a window behind you, both of which silhouette your face.
- Mounting: a boom arm keeps your mic close to your mouth without cluttering your desk.
- Pop filter: cuts the harsh "p" and "b" sounds that a bare mic picks up.
- Shock mount: stops desk knocks and keyboard vibration from reaching your audio.
Pro Tip: Test your mic levels by talking normally, not shouting. Most beginners set gain while speaking louder than they do mid-game, then wonder why they're inaudible later.
Streaming software, encoder selection and recording formats
OBS Studio is the broadcasting software we'd point almost every beginner towards. It's free, runs on modest hardware and supports every major platform and encoder type, which covers you whether you're on a laptop with integrated graphics or a dedicated gaming rig.
The core decision is encoder choice. Software encoding (x264) gives excellent quality control but leans entirely on your CPU, which can starve your game of processing power. Hardware encoders including NVENC, AMF, Quick Sync, Apple VT and newer AV1 encoders offload that work to dedicated chips, generally delivering very good quality with far less strain on the rest of your system. Older hardware encoder generations were a noticeable step down in quality, so if your GPU is several years old, check which generation of encoder it carries before assuming it'll match a modern card.
Bitrate should match both your resolution and your upload speed, not just your ambition:
- 720p at 30 frames per second: roughly 2,500 to 4,000 kbps.
- 1080p at 30 frames per second: roughly 4,500 to 6,000 kbps.
- 1080p at 60 frames per second: roughly 6,000 to 9,000 kbps.
According to Tech Guide's analysis of what makes an Australian stream work, you should leave headroom of 20 to 30% between your measured upload speed and your chosen bitrate to absorb everyday network variability.
For recording, stick with OBS's default MKV container, since a dropped stream or crash leaves you with a recoverable file, and remux to MP4 only when a platform specifically needs that format.
Before your first stream, run through this quick OBS checklist: set your base and output resolution to match your monitor, choose your encoder based on CPU headroom, set bitrate using the ranges above, and run a short test recording to confirm audio and video sync.
Network and upload: test your connection and match bitrate
Your upload speed is the hard ceiling on stream quality, no matter how good your PC is. A stream bitrate higher than your connection can sustain causes buffering and dropped frames for your viewers, regardless of how smooth the game looks on your end.
- Run a speed test using any reputable tool and note your upload figure specifically, not your download speed, which is irrelevant for streaming.
- Apply the headroom rule: keep your stream bitrate at roughly 70 to 80% of your tested upload speed, as Tech Guide recommends for Australian streamers, since connections vary across FTTN and FTTP-style technologies.
- Match your bitrate choice to that number, using the resolution targets from the previous section rather than picking a number because it looks impressive.
If your connection is inconsistent, a few changes help more than any hardware purchase: connect your streaming PC by wired Ethernet rather than Wi-Fi, pause cloud backups and other background uploads while live, and keep your router in an open position rather than tucked in a cupboard. Our home Wi-Fi setup guide walks through getting a more reliable connection in under half an hour. If your upload speed genuinely can't support even 720p streaming, it's worth contacting your provider about a plan upgrade before you spend another dollar on parts.
Optimisation and troubleshooting: quick fixes that save performance
Most streaming problems are configuration issues, not hardware failures, and they're free to fix. OBS's own troubleshooting guidance recommends running OBS as administrator on Windows, which lets it request reserved GPU time instead of competing with your game for resources.
- Cap your in-game frame rate or enable V-Sync, which frees GPU capacity that would otherwise go to rendering frames you don't need.
- Limit browser sources and overlays, since each one renders separately and adds real load to your encoder.
- Simplify your scene collection if you're running several alert layers and webcam filters at once.
That tells you which resource to free up rather than guessing.
Keep your graphics drivers current, but don't chase every release the day it lands. If a stream that worked fine suddenly drops frames after an update, rolling back to the previous driver version is a reasonable first step before assuming your hardware has failed.
Pro Tip: If none of the quick fixes help, dropping your stream resolution from 1080p to 720p for one test stream will tell you immediately whether your bottleneck is encoding capacity or something else entirely.
If you've worked through this list and performance still won't settle, that's usually a sign of a deeper configuration issue, and it's a reasonable point to bring in professional help rather than keep guessing.
PC Scientist checklist and how we can help
Before your first real broadcast, run through five checks: test your upload speed, test your microphone levels, run a short OBS scene test, do a trial recording, and confirm you've got a backup plan if your PC or connection drops mid-stream.
If you'd rather have someone handle the technical side, we offer several services that map directly onto this list, including custom PC builds, onsite Wi-Fi tuning, device setup, and troubleshooting.
Audio setup and acoustic treatment basics
A good microphone in a bad-sounding room still sounds bad. Echo and background noise come from hard, flat surfaces, so even small changes make a real difference without any expensive treatment.
A rug on a hard floor, curtains instead of bare blinds, and a bookshelf or soft furniture behind you all absorb sound that would otherwise bounce around and muddy your voice. You don't need foam panels to start; a bedroom with soft furnishings usually sounds noticeably better than a bare office or garage.
Microphone placement matters as much as the room. Keep your mic six to twelve centimetres from your mouth, slightly off-axis rather than pointed straight on, which reduces the plosive pops a pop filter can't fully catch on its own.
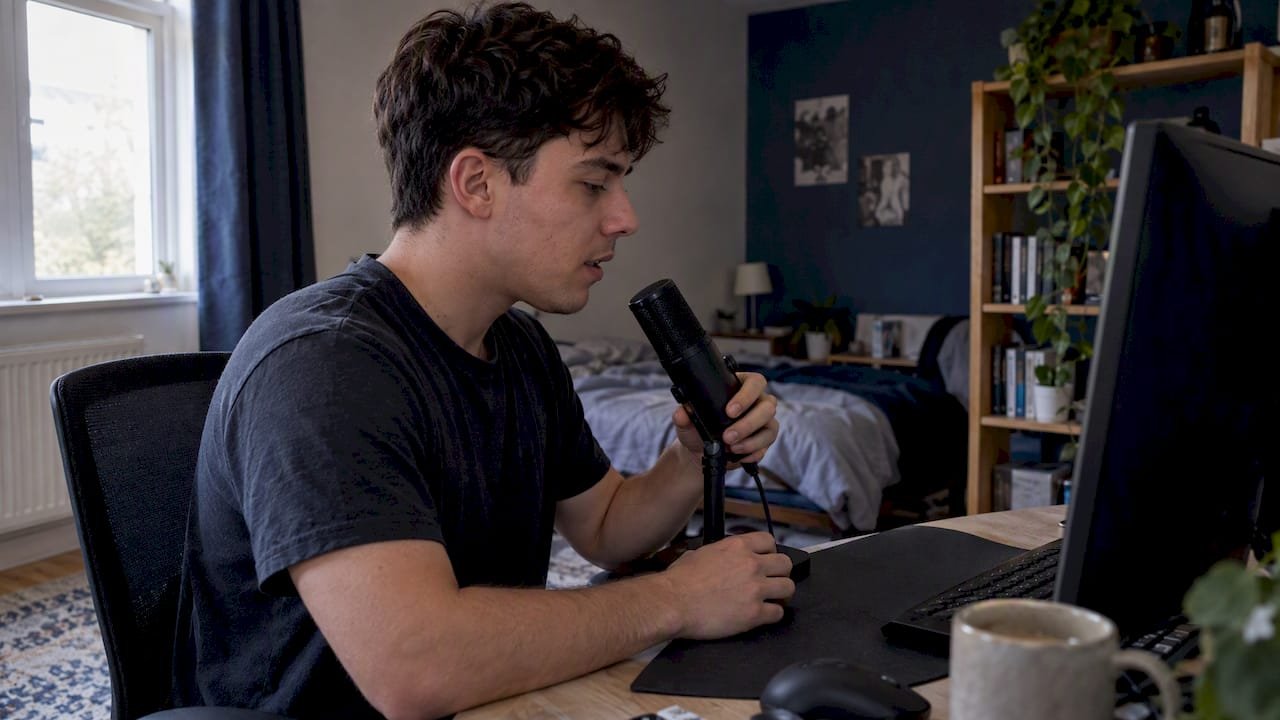
Background noise from fans, air conditioning or a mechanical keyboard is worth addressing before you touch any software processing. Most USB microphones and audio interfaces include basic noise gating in their companion software, which mutes your mic during silence and stops low-level hum from bleeding into your stream.
If you're using OBS's built-in audio filters, a noise suppression filter and a light compressor go a long way towards evening out your volume without sounding processed. Start subtle. Over-compressed audio is one of the most common beginner mistakes, and it's more noticeable to viewers than a slightly quiet mic.
Stream interaction tools integration: chat, alerts and overlays
Viewer interaction is what turns a video feed into an actual stream, and most of the tools that handle it integrate directly with OBS through browser sources, so you don't need separate software running in the background.
Chat overlays pull your platform's chat window onto your scene so you can respond without alt-tabbing out of your game. Alert tools display pop-ups for new followers, subscribers or donations, usually configured through a browser source URL you paste once and leave alone.
Keep your first setup simple. A chat box, a single alert type and a basic "starting soon" scene cover everything a new streamer actually needs. Adding six alert types and three overlays on day one adds load on your encoder for very little viewer benefit, and it's one more thing that can break mid-stream.
If you're recording for later editing or want a quick way to pull highlights from a long session, tools built specifically for condensing stream footage into a short written recap, such as Baitless's approach to summarising live streams, can save real time compared with scrubbing back through hours of footage manually.
Basic lighting positioning and setup for clear video
One light, correctly placed, outperforms three lights placed badly. Position your main light slightly above eye level and roughly 45 degrees to one side of your face, angled down slightly so it doesn't glare directly into the camera.
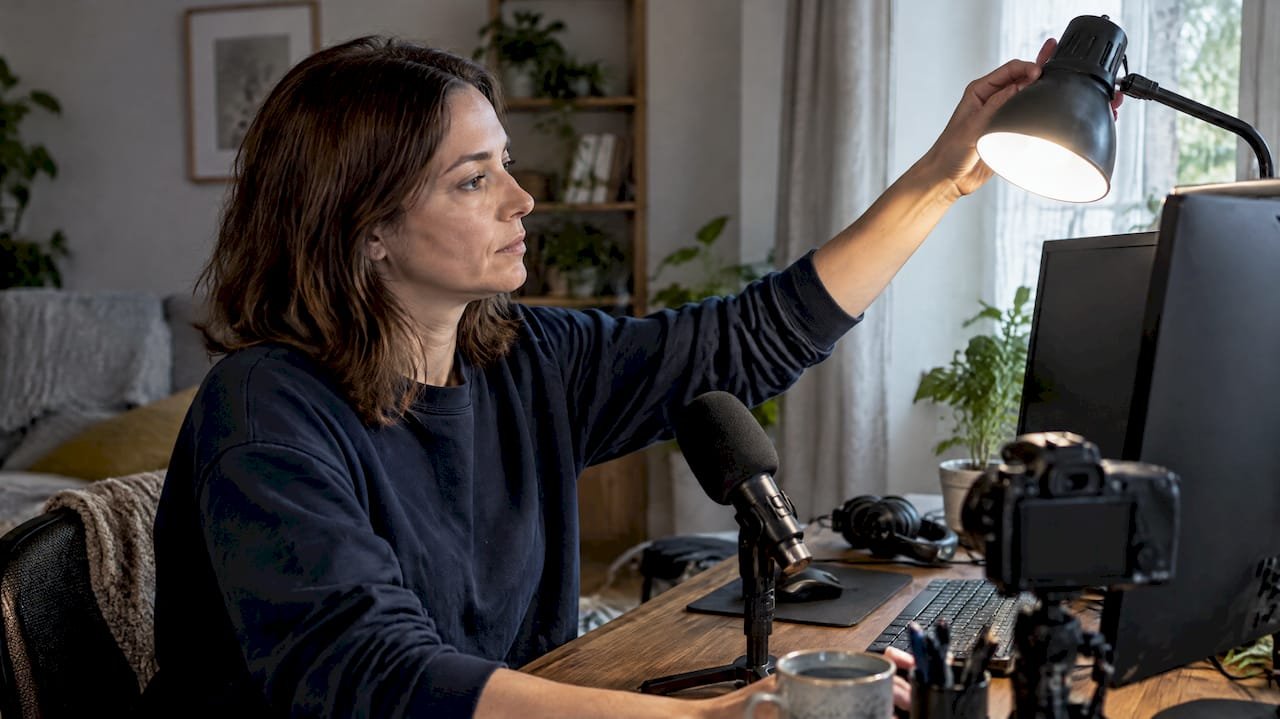
Avoid lighting yourself from directly behind the camera, which flattens your face and removes any sense of depth. A window to your side works well during the day, but swap to an artificial light once the sun moves, since daylight shifts colour temperature throughout a session and can make your footage look inconsistent if you're streaming for hours.
If shadows fall across one side of your face, a second, dimmer light opposite your main one fills them in without competing for attention. This doesn't need to be an expensive dedicated streaming light. A desk lamp with a diffuser, or even a sheet of paper between a bare bulb and your face, softens harsh light enough to look noticeably better on camera.
Check your framing and lighting on a trial recording before you go live, not during the stream itself. Small adjustments, like turning your light's angle by a few degrees, are far easier to fix when you're not also managing chat and gameplay at the same time.
Background setup or green screen use and setup
Your background says almost as much about your stream as your webcam does. A tidy, uncluttered space behind you reads as more professional than an expensive camera pointed at a messy room.
A physical green screen lets streaming software replace your background entirely, which is useful if your actual room isn't camera-ready or you want branded overlays behind you. OBS's built-in chroma key filter handles this without extra software, though even lighting across the green screen matters more than the fabric's exact shade, since shadows and creases cause patchy keying.
If you'd rather skip the screen altogether, a simple physical backdrop, a curtain, a plain wall, or a bookshelf arranged deliberately, avoids chroma key issues completely and still looks deliberate on camera. This is the easier starting point for most beginners, since a green screen adds a lighting requirement on top of everything else you're already managing.
Whichever route you choose, keep moving or reflective objects out of frame. A ceiling fan or a monitor reflecting your game in the background is a common distraction that's easy to avoid once you've noticed it.
Streaming platform choices and basics: Twitch, YouTube and more
Twitch remains the platform most new streamers think of first, built specifically around live interaction, chat culture and a discovery system that rewards consistent streaming schedules. YouTube's live streaming sits inside a platform built for on-demand video, which means your streams automatically become searchable video-on-demand content afterwards without extra editing work.
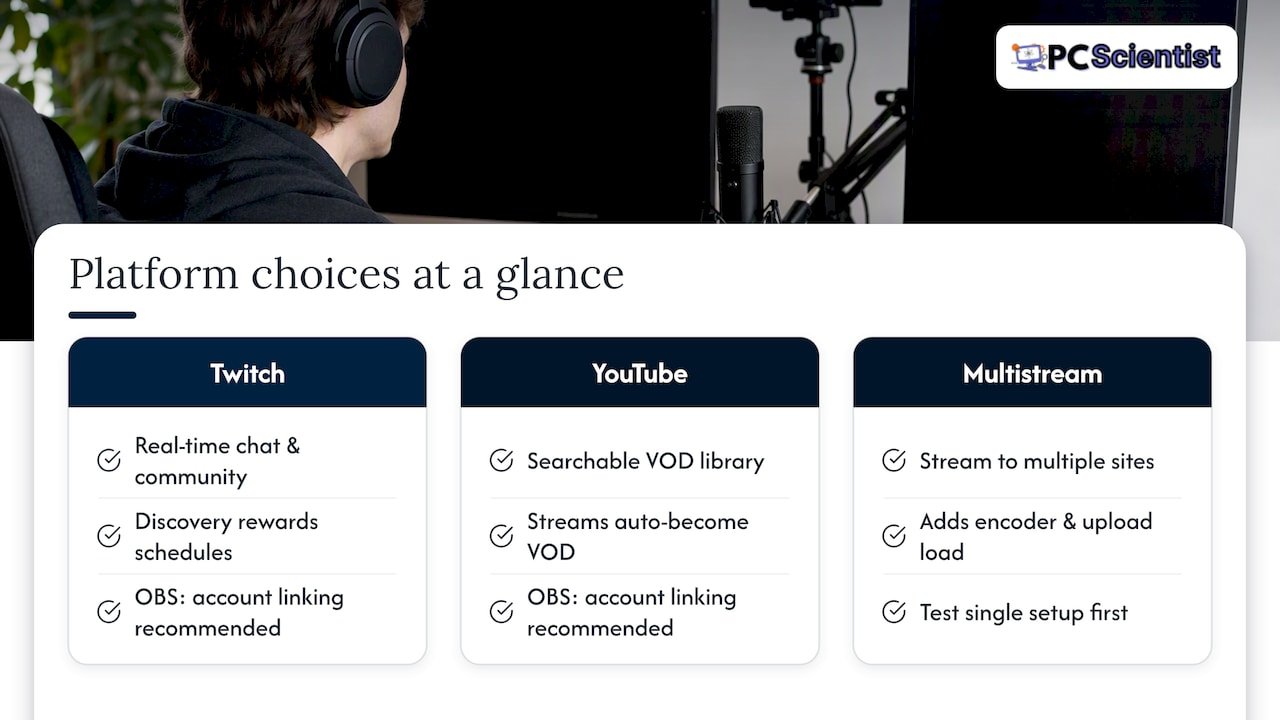
Each platform has its own recommended settings inside OBS, usually accessed by linking your account directly rather than copying a stream key manually, which reduces setup errors for beginners.
If you're undecided, think about what you want from the archive. Twitch leans toward real-time community building, while YouTube leans toward building a searchable library that keeps attracting views long after you've finished streaming. Some beginners stream to both using multistreaming tools built into OBS or third-party services, though running two destinations at once adds extra load on your encoder and upload connection, so it's worth testing your single-platform setup thoroughly before doubling the output.
What we think beginners get wrong
Most beginner guides lead with hardware, and that's backwards. The gear you buy matters far less than whether your upload connection can actually carry the bitrate you've set and whether anyone can understand what you're saying. We'd rather see someone stream at 720p on a modest PC with clear audio than at 1080p on a powerful rig nobody can hear properly.
The conventional advice to "get a good GPU" also skips a step: a modern GPU's hardware encoder is often the single biggest quality-per-dollar improvement available, more so than chasing extra CPU cores for software encoding. And the dual-PC setup gets recommended too early, too often. It solves a specific problem, an overloaded single PC, that most beginners haven't actually hit yet.
If we had to rank priorities for someone starting today: test your connection first, fix your audio second, then worry about the PC itself. Everything else, including lighting and overlays, is polish you add once the fundamentals are solid.
- PC Scientist
Book PC Scientist for setup, tuning or a custom streaming PC
If you'd rather have someone else handle the technical groundwork, we build custom streaming and gaming PCs, tune home Wi-Fi for a steadier upload, and set up new devices so they work properly from the first session.

- Custom PC builds matched to your games, budget and streaming goals.
- Onsite Wi-Fi and network tuning for a connection that holds up during a live stream.
- Device setup and troubleshooting when something's not performing the way it should.
Every job starts with a straightforward assessment and clear pricing before any work begins, so you know what you're paying for upfront. Have a look at our Custom PC Build Scientist service if you're ready to get your streaming setup sorted properly.
Sources
- Hardware encoding | OBS Studio
- The gear is the easy part: what actually makes an Australian stream take off | Tech Guide
- How to start streaming | Officeworks
Recommended
- Your new PC setup checklist: eight things to do first
- Home Wi-Fi setup: get online in under 30 minutes
- Computer running slow? Here's what to try first
Frequently Asked Questions
Straight answers about Streaming PC Setup: Start With Upload and Audio, Not Gear - without jargon or pressure. Call 0493 563 381 for advice, or get help below.
Want the quickest answer? 0493 563 381 for free advice.
The best setup for a beginner pairs a modern GPU with a capable hardware encoder, 16 gigabytes of RAM, an SSD for your OS and games, and a stable, tested upload connection. A decent microphone matters more than most hardware choices, since audio quality is the upgrade viewers notice first.
Start by choosing your CPU and matching motherboard platform, then add a GPU suited to your games and encoding needs, 16 gigabytes of RAM, an SSD for your operating system, and a power supply with headroom above your components' requirements. If you'd rather skip the research and assembly, our Custom PC Build Scientist service builds and configures the machine for you.
At a minimum you need a CPU or GPU capable of encoding, 8 gigabytes of RAM (16 gigabytes recommended), an SSD, a decent microphone and a tested, stable upload connection. Everything beyond that, including a webcam, lighting and a second PC, improves the experience rather than enabling it.
Pricing depends heavily on your target resolution, frame rate and whether you need a dedicated hardware encoder, since component costs shift constantly with the market. For an exact figure based on your specific goals, our Custom PC Build Scientist service quotes builds individually after understanding what you actually want to stream.
Run a speed test and check your upload figure specifically, then keep your streaming bitrate at roughly 70 to 80% of that number, as Tech Guide recommends for Australian connections. If your upload speed can't comfortably support 720p streaming even with that headroom, a wired Ethernet connection or a plan upgrade is worth considering before any hardware purchase.
Device setup across NSW
Still stuck setting up a streaming PC?
If setup still feels unfinished, that is okay. Get help in your area and we will take it from here.
Start here
Get device setup help
Optional Need a Sydney city or region?
Choose a side of Sydney
These are Sydney cities and regions, such as the Northern Beaches or Inner West. First tap a side of Sydney. Then open the city or region that covers you.
C Sydney City / Inner 3 areas
N Northern Sydney 6 areas
NW North-West / Central Sydney 3 areas
W Western Sydney 1 area
SW South-West Sydney 3 areas
S Southern Sydney 2 areas
Optional Find your suburb
Type a suburb from our listed coverage. This opens the matching city or region page for this topic. Listed suburb pages are general technology services, not this specialist page.
If your suburb is not listed, use the city or region list above, or call 0493 563 381.
Disclaimer
The information in this article is provided for general educational and informational purposes only. While PC Scientist strives to keep all content accurate and up to date, technology issues can vary depending on your device, software, network configuration, and individual circumstances. Always back up important data before attempting repairs or system changes. If you are unsure or the issue cannot be resolved safely, contact PC Scientist today for professional onsite or remote IT support. PC Scientist is not liable for any loss of data, damage, or other issues resulting from the use of the information provided in this article.