


Access point placement: ceiling first, then 15-20% overlap
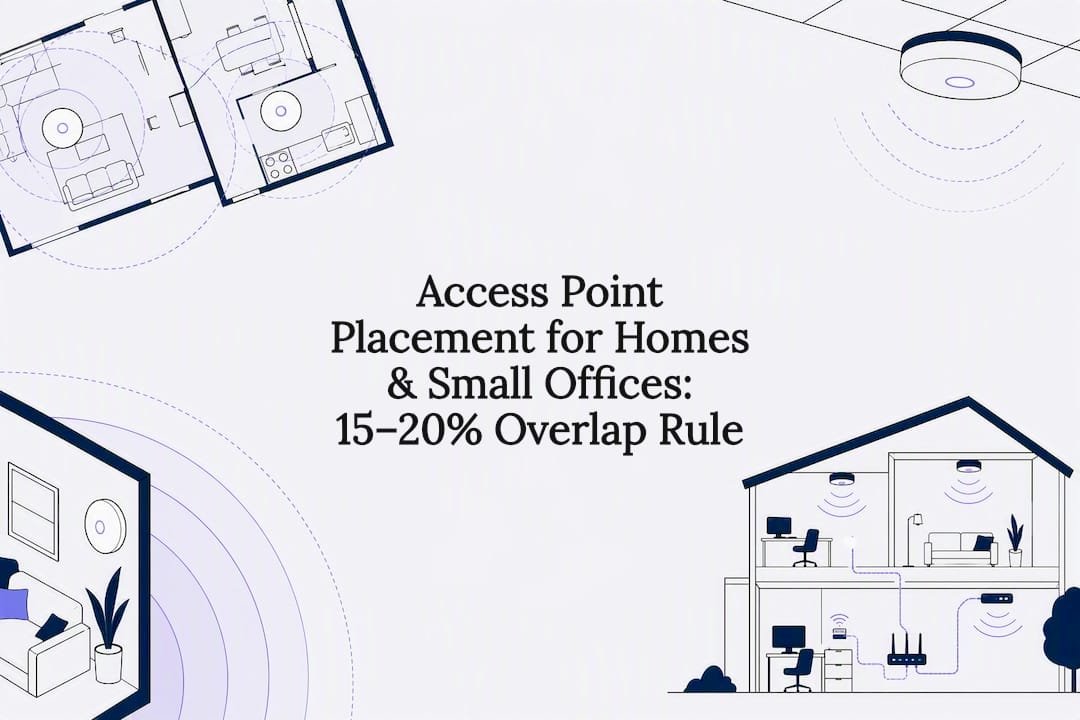
The router is in the cupboard. The NBN box is by the front door. Your laptop is on the kitchen table. That gap is why one room works and the next one does not. Mount the access point on the ceiling over where people actually sit, wire it with Cat6 and Power over Ethernet, then overlap the next cell by about 15-20%. Walk-test to -70 dBm before you buy another unit.
- Ask where people actually sit. The AP belongs over the kitchen, lounge, or desks, not over the ISP box.
- Ask whether you can run a cable. A wired backhaul beats mesh hopping. Leave a service loop so you can shift the mount a few centimetres.
- Ask what the walls are made of. Brick, concrete, and metal ducts eat 5 GHz and 6 GHz. Tighten the spacing there.
- Ask what the walk-test says. If a room is weaker than -70 dBm, move the AP or change the channel before you add hardware.
If you would rather not guess the ceiling points, Network Scientist can map it. Sydney can start with Wi-Fi help across Sydney. Central Coast homes can use Wi-Fi help on the Central Coast.
Still getting drops after you placed the first AP? Try Wi-Fi keeps dropping. Choosing mesh or a cheap extender? See mesh Wi-Fi vs extender.
Key takeaways
Ceiling first. Wire it. Overlap the next cell a little. Walk-test before you spend. Outdoor coverage is its own cell, not leftover indoor signal.
| Point | Details |
|---|---|
| Ceiling over use | Mount the AP over where people sit with laptops and phones, not beside the NBN box or inside a cabinet. |
| 15-20% overlap | Adjacent cells should overlap enough for roaming. Too much overlap through a brick wall just makes two APs fight. |
| One per 110-170 m2 | That is a starting grid for timber-frame homes. Brick, concrete, and double brick need tighter spacing. |
| -70 dBm walk-test | Walk every room you care about. Tune power and channel first. Add another AP only after that fails. |
| Outdoor is its own cell | Patio and yard need a weatherproof unit, sealed cable, and a downward angle. Indoor spillover rarely reaches the fence. |
Table of contents
- Why access point placement changes the whole house
- Four placement rules that hold in most homes
- Ceiling, wall, or in-wall: what actually works
- How many APs, and how far apart
- Home, two-storey, and small office checklists
- Wiring, PoE, and the bits that stall a DIY install
- Walk-test to -70 dBm before you buy another AP
- The placement mistakes we keep seeing
- Outdoor access points under the eave
- When to stop guessing and get a site survey
- Sources
- FAQ
Why access point placement changes the whole house
Radio does not travel like light. It bounces, it soaks into brick, and it dies a little every time it crosses a wall or a fridge. Two homes can have the same router and a completely different result. One AP sits high with a clean path. The other is stuffed behind the TV.
The ITU indoor propagation guidance says the same thing technicians already do: put the radio high, near the ceiling, so you keep as much line of sight as you can. That one decision beats most settings in a router admin page.
- 2.4 GHz gets through walls. It is slower. Use it for reach and for little IoT sensors.
- 5 GHz and 6 GHz are faster. They fade fast through brick and concrete. They need a cleaner path.
- Newer Wi-Fi 7 radios do not change that trade-off. Higher bands stay fast and fragile indoors.
A high, central mount gives every band a better chance of reaching the rooms you actually use.
Four placement rules that hold in most homes
You can apply these in a terrace, a brick veneer, or a small office. The floor plan changes. The rules do not.
- Centre the AP over where people use devices. Not over the rack. Not over the NBN entry. An AP two metres from the kitchen table still feels like a poor result.
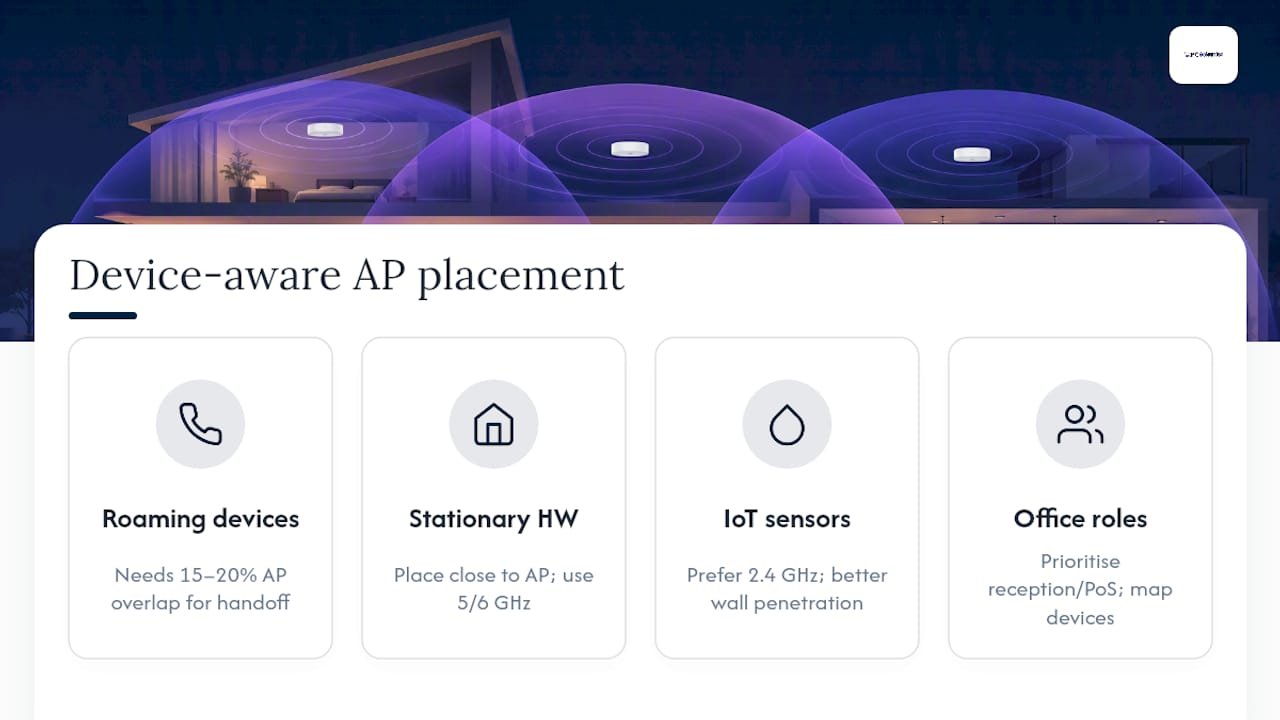
- Overlap adjacent cells by 15-20%. That is how a phone walks from the lounge to the hallway without dropping. Do not stack two APs on top of each other through a dense wall.
- Keep APs clear of cabinets, metal, and ducting. Steel beams, ducted air, and metal shelving bend the pattern in ways a floor plan will not show you.
- Wire every AP you can. A Cat6 backhaul stops the access points from stealing airtime from your phones.
Pro Tip: If the AP has to sit near a steel beam, slide it 200 to 300 millimetres sideways before you turn the power up. A small move changes the bounce more than a louder radio, and it does not punch the next cell.
Ceiling, wall, or in-wall: what actually works
Ceiling mounting wins in almost every home and small office. Furniture and people sit below it. The pattern goes out in every direction.
- On a normal ceiling, mount the AP flush or just under the plaster, centred in the room or hallway it serves.
- Wall mounting is the fallback when you cannot cable the ceiling: heritage homes, strata limits, or an exposed slab. Mount above 2 metres. Expect a more directional, less even result.
- In-wall units suit a retrofit where you are replacing a wall plate and do not want new visible cable. They cover less floor than a ceiling unit.
- Vaulted or very high ceilings look tidy with an AP at 4 or 5 metres. The signal then aims down past the height of a laptop. A mid-height wall mount closer to people often works better.
How many APs, and how far apart
Most homes need fewer access points than people buy. Too many, with no channel plan, is its own fault.
- Start with one AP per 110 to 170 square metres in timber-frame or plasterboard construction. Installer sizing guides land in that band for a typical house.
- Tighten the grid in concrete floors, brick internals, or double brick. Those materials soak far more signal than a stud wall.
- Open plans like a simple grid. Long, skinny terraces like a line of APs down the hallway.
- Stagger non-overlapping channels. Drop transmit power a little on units that sit close. Then walk-test before you lock it in.
Three APs in a triangle, each covering a third of the floor with overlap at the edges, is the usual starting sketch for anything larger than a small apartment.
Home, two-storey, and small office checklists
The building type changes the starting guess. The walk-test still decides it.
- Single-floor, open-plan home: one ceiling AP in the middle. If the house stretches past that footprint, or has a separate wing, add a second AP at the far end. Do not just turn the power up on the first one.
- Two-storey home: one AP per floor. Hallway or stair landing, not a bedroom. Circulation spaces reach more rooms.
- Small office: map the meeting rooms first. Six people on video calls need their own AP. Plan the wired backhaul before anyone drills.
Shared spaces make better AP homes than the room nobody sits in.
Wiring, PoE, and the bits that stall a DIY install
The mount only works if the cable behind it is honest.
- Run a dedicated Cat6 home-run from the switch or patch panel to each AP. Do not daisy-chain.
- Leave a service loop at the AP end so you can shift the mount during install without pulling a new run.
- A PoE switch suits several APs plus cameras. A single injector is fine for a one or two AP retrofit.
- Respect bend radius in joists. Check the roof space is safe before anyone climbs up to terminate.
Check the switch PoE budget against cameras, printers, and a NAS as well as the AP count. An unmanaged 8-port that is already full is why a tidy placement plan fails on the day.
Guest and staff SSIDs, or a separate IoT network, need every AP to broadcast the same set. A later AP missing a VLAN looks like a dead spot. It is a config gap.
Walk-test to -70 dBm before you buy another AP
Placement is not finished until you have stood where people stand.
- Walk with a Wi-Fi analyser on a phone or laptop. Log every bedroom, the home office, and the patio if it matters.
- Treat about -70 dBm as the practical cell edge. That is where the next AP should pick up.
- Aim for a signal-to-noise ratio of at least 20 dB in rooms where people work, stream, or game.
Target numbers: keep RSSI above roughly -70 dBm anywhere you need usable Wi-Fi. Try power, channel, or a 300 millimetre move before you order another unit.
Placement first. Channels second. The 2.4 GHz band only has three clean channels in Australia. Good geometry makes that overlap hurt less. 5 GHz and 6 GHz have more channels, but a bad mount shows up as a hole, not just interference. Scan neighbouring networks in a terrace or apartment before you keep the factory channel.
Newcastle and the Hunter can start with Wi-Fi help in Newcastle if the walk-test still looks ugly after you have moved the first AP.
The placement mistakes we keep seeing
- AP on a desk or inside a cabinet. Move it to the highest clear point in the room. Today.
- Too many APs at full power. Stagger channels. Drop power on the ones that overlap.
- Ignoring brick and concrete. Check the wall before you copy a timber-frame plan.
- Judging the whole house by one fast laptop. A door sensor on 2.4 GHz in the back room needs a different margin than the media room on 6 GHz.
Heavy, stationary devices - the 4K TV, the desk PC on video calls - deserve the nearest clean 5 GHz or 6 GHz AP. Phones walking between rooms need the overlap more than raw speed in one spot.
Outdoor access points under the eave
The patio is not leftover indoor signal. Treat it as its own cell.
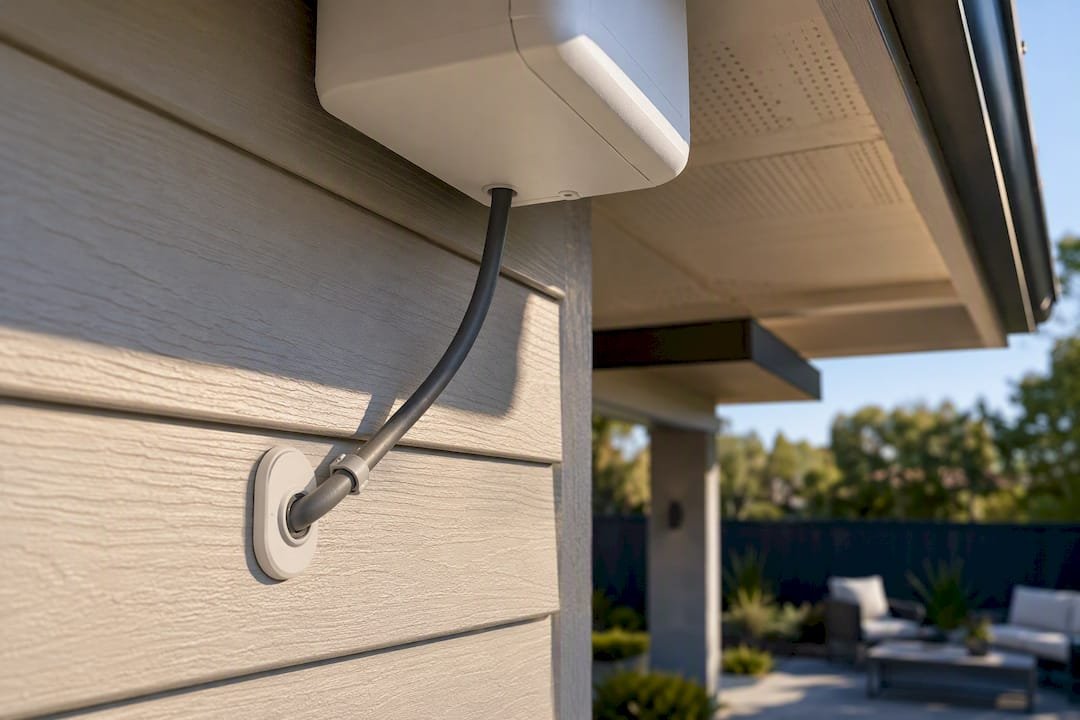
Use a purpose-built outdoor unit or an IP-rated enclosure. An indoor AP under partial cover still fails in rain and humidity. Angle it slightly down toward the zone you want, not straight into the sky.
Glass sliders, brick veneer, and garden foliage cut the signal. An AP that covers the lounge often dies at the edge of the deck. Run weatherproof, UV-rated cable through a sealed penetration. That cable path is where most DIY outdoor jobs stall.
Scan 2.4 GHz outside as well. Neighbour Wi-Fi, cameras, and some garden lighting controllers sit on the same band.
When to stop guessing and get a site survey
A single-floor home with two or three rooms is a fair DIY job. Two storeys, concrete, or an office with several meeting rooms usually wants a proper survey. That is the line where a walk-test app stops being enough.
A survey measures coverage, interference, and whether the switch can actually power the APs you sketched. Then a post-install walk-test confirms the numbers, not the diagram.

Network Scientist handles placement, cabling, and the walk-test for homes and small offices. Call 0493 563 381 if you want a person to look at the floor plan and the cable path, then take the next small step. Wollongong can use Wi-Fi help in Wollongong and the Illawarra, or pick your area in the list below.
First-time home Wi-Fi, with no extra APs yet? Start with home Wi-Fi setup.
Sources
These pages sit behind the numbers on this guide:
- ITU-R P.1238-11: indoor radiocommunication planning
- Empirical assessment of Wi-Fi 7 performance across indoor impairments
- How many Wi-Fi access points do you need - Data Wire Solutions
- Wi-Fi access point placement and cabling - CrimpShop
Frequently Asked Questions
Straight answers about access point placement - without jargon or pressure. Call 0493 563 381 for advice, or get help below.
Want the quickest answer? 0493 563 381 for free advice.
Mount it on the ceiling, centred over the rooms where people actually use their devices, with a wired run back to your switch. If you cannot get into the ceiling, high on a wall is the next best option.
Ceiling mounting almost always wins. It gives a clearer line of sight and a more even pattern in every direction. Wall mounting is fine for a retrofit, but the coverage will be a bit more directional.
Budget for one AP per floor. Put each one in a hallway or stair landing, not inside a bedroom. Circulation spaces reach the rooms that branch off them more evenly than a single room ever can.
In a typical timber-frame home, start with one AP per 110 to 170 square metres. Tighten that in brick or concrete. Then walk-test. Overlap the cells by about 15-20% so phones can roam without a dead patch.
Wi-Fi help across NSW
Still stuck with dead spots after moving the AP?
If rooms still drop out after you moved the access point, that is okay. Get Wi-Fi help in your area and we will take it from here.
Start here
Get Wi-Fi help
Optional Need a Sydney city or region?
Choose a side of Sydney
These are Sydney cities and regions, such as the Northern Beaches or Inner West. First tap a side of Sydney. Then open the city or region that covers you.
C Sydney City / Inner 3 areas
N Northern Sydney 6 areas
NW North-West / Central Sydney 3 areas
W Western Sydney 1 area
SW South-West Sydney 3 areas
S Southern Sydney 2 areas
Optional Find your suburb
Type a suburb from our listed coverage. This opens the matching city or region page for this topic. Listed suburb pages are general technology services, not this specialist page.
If your suburb is not listed, use the city or region list above, or call 0493 563 381.
Disclaimer
The information in this article is provided for general educational and informational purposes only. While PC Scientist strives to keep all content accurate and up to date, technology issues can vary depending on your device, software, network configuration, and individual circumstances. Always back up important data before attempting repairs or system changes. If you are unsure or the issue cannot be resolved safely, contact PC Scientist today for professional onsite or remote IT support. PC Scientist is not liable for any loss of data, damage, or other issues resulting from the use of the information provided in this article.