

M.2 SSD Not Detected? How to Fix It Step by Step
Most undetected M.2 drives come down to one of four things: the drive isn't seated properly, the slot doesn't support that type of drive, a BIOS setting is in the way, or Windows can see the drive but hasn't set it up yet. Work out where the drive goes missing (BIOS, Windows, or both) and the fix usually becomes obvious within ten minutes.
This guide walks you through that order, in plain language. It also tells you when to stop poking around, because if the drive holds files you care about, a few wrong clicks can make recovery harder.
Key takeaways
- First check where it's missing: BIOS/UEFI, Windows, or both. That one answer points you to the right fix.
- If it's missing in BIOS, reseat the drive, confirm the slot supports NVMe (not just SATA), check for slot sharing, and update the BIOS.
- If BIOS sees it but Windows doesn't, open Disk Management. A new drive often just needs to be initialised and given a volume.
- If the drive vanishes, shows 0 GB, or goes read-only, stop. Don't format or initialise anything if the data matters.
- Stuck? We can come to you across NSW, or help remotely where it suits.
Table of Contents
- Step one: find out where the drive goes missing
- Why an M.2 or NVMe drive isn't detected
- Check compatibility before anything else
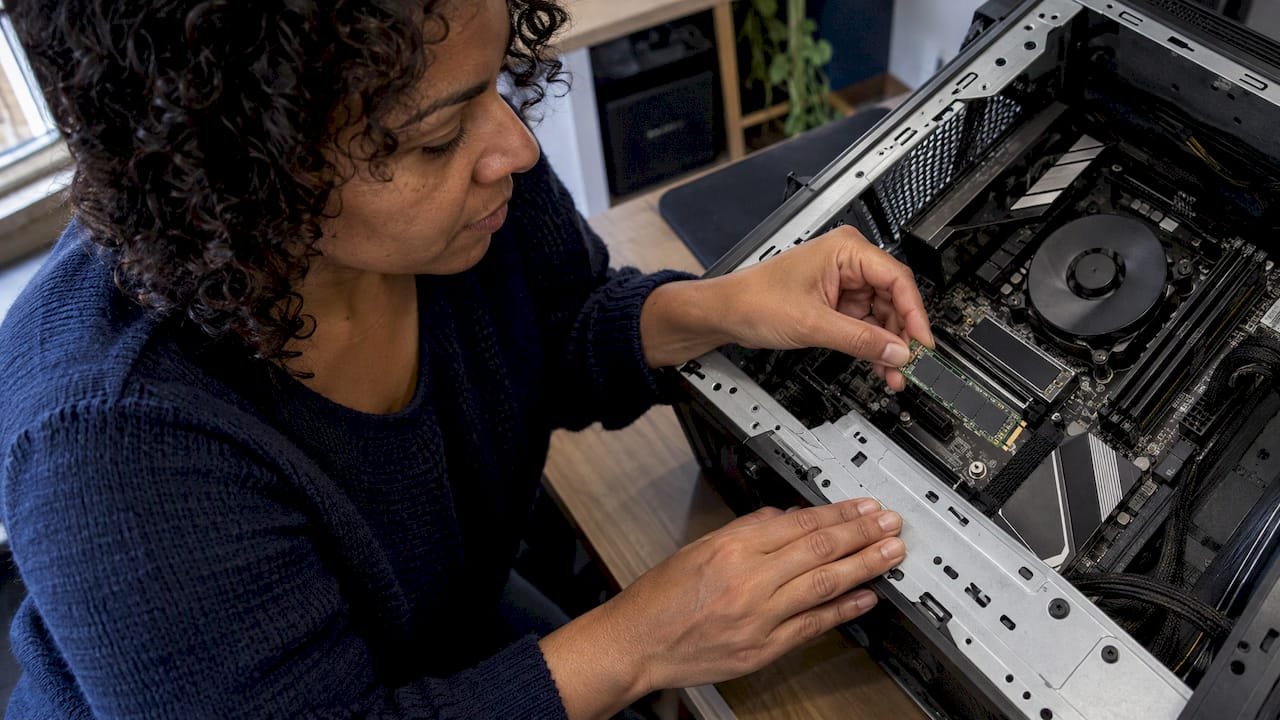
- Reseat the drive properly
- Rule out a dead drive or a dead slot
- BIOS and UEFI settings that matter
- BIOS sees it, Windows doesn't
- When to stop and get the drive checked
- Our perspective
- Need a hand with it?
- A quick checklist you can follow in order
- FAQ
- Sources
Step one: find out where the drive goes missing
Before you open the case, restart and tap the BIOS key (often Delete, F2 or F10, depending on the brand). Look at the storage information. Then boot into Windows, right-click Start and open Disk Management.
There are three outcomes:
| What you see | What it usually means | Go to |
|---|---|---|
| Missing in BIOS and Windows | Hardware, slot or BIOS setting issue | The hardware and BIOS sections |
| Seen in BIOS, missing in File Explorer | Drive needs initialising, a volume or a drive letter | The Windows section |
| Appears briefly, then disappears | Possible drive or controller fault | The "stop and get it checked" section |
A word on reading BIOS screens. Intel's guidance shows that on some platforms the NVMe drive isn't listed where you'd expect. Intel explains that you can look under Advanced, then PCI Configuration, then UEFI Option ROM Control for NVMe devices, and that with VMD enabled the drive can appear under Intel Virtual RAID On CPU. So if you can't spot it, check a couple of menus before deciding it's gone.
Also, don't rely on the simple "EZ Mode" screen. ASUS notes that some older models with a PCIe-mode M.2 SSD (including NVMe) won't show it in EZ Mode storage information, and says this is normal for those models. Switch to Advanced Mode and look again.
Why an M.2 or NVMe drive isn't detected
Dell's Australian support guide lists the common causes:
- The drive isn't fully seated or secured.
- It's the wrong physical size for the slot (for example a 2280 drive in a slot built only for 2230).
- The M.2 slot supports SATA only, or it's disabled in BIOS because it shares lanes with something else.
- BIOS settings are misconfigured (PCIe lane, storage mode, Secure Boot).
- It's a brand-new drive that hasn't been initialised and formatted yet, so it won't show in File Explorer.
That last point catches a lot of people out. A new SSD is blank, and Windows won't show a blank drive until you set it up. Nothing is broken.
Check compatibility before anything else
M.2 describes the shape of the drive, not what's inside. An M.2 SATA drive and an M.2 NVMe drive fit the same style of slot but aren't interchangeable. HP's buying guide points out that some slots take only NVMe and some only SATA, so check the documentation for what your slot supports.
That's the classic case on older laptops and budget motherboards: an NVMe drive in a SATA-only M.2 slot. It looks right and sits right, and it never shows up. Seagate's installation guide says the same thing in practical terms: confirm that your motherboard supports an M.2 PCIe NVMe drive and that the SSD's key matches the socket.
What to do:
- Find your exact motherboard or laptop model (it's printed on the board, or in System Information in Windows).
- Open the manual or the maker's specification page and look at the M.2 section.
- Note which slots support NVMe, SATA or both, and the maximum length.
- Compare with the label on your SSD.
If the slot and drive don't match, no setting will fix it. It's worth knowing early, before you spend an afternoon on BIOS menus.
Reseat the drive properly
A drive that is slightly off its connector is the most common cause, and the easiest to fix. Switch the machine off and unplug it from the wall first. On a laptop, disconnect the charger and follow the maker's guidance on the battery.
Dell's reseat procedure is a good model:
- Power off and unplug.
- Remove the M.2 retaining screw.
- Gently remove the drive.
- Reinsert it at roughly a 30-degree angle.
- Press it down flat and refit the screw.
- Power on and check detection.
NZXT adds a handy visual check: when an M.2 drive is secured correctly, you shouldn't be able to see the gold edge connector, and the drive should sit parallel to the motherboard. If a different M.2 slot is available, try the drive there too.
One more tip from ASUS: confirm the screw is actually locked, and check whether the M.2 port shares bandwidth with a SATA port such as SATA6G_1. Fitting a drive into a shared SATA port can switch off the M.2 slot, which is a very common reason a drive that worked yesterday has gone missing today.
Static is a real risk with bare circuit boards. Touch a metal part of the case before handling the drive, and hold it by the edges.
Rule out a dead drive or a dead slot
If you have a spare PC, or a USB enclosure that suits your drive type, check whether the SSD works elsewhere. BIOSTAR's support advice is to make sure the M.2 device works on other computers, reinstall it, and try another M.2 socket if your board has more than one.
The result tells you a lot:
- Drive works elsewhere: the problem is your motherboard, slot or settings.
- Drive fails everywhere: the drive itself is the suspect. Skip ahead to the section on stopping and getting help.
BIOS and UEFI settings that matter
Once the hardware is right, move to settings. Change one thing at a time and write down what you changed, so you can undo it.
Update the BIOS
An old BIOS may not understand a newer drive. Samsung says that if the BIOS is outdated it may not support the SSD, and recommends updating to the latest version. ASUS gives the same advice: download the latest BIOS from the official site, then recheck storage information.
Only download BIOS files from your motherboard or laptop maker. Don't switch the power off during an update, and on a laptop keep it plugged in. If you're nervous about this step, it's a perfectly reasonable point to ask someone to do it for you.
Check the storage mode
Dell recommends checking that the M.2 slot is enabled and that SATA Operation is set to AHCI, not RAID, unless you're deliberately building a RAID array. Save and exit, then see whether the drive appears. Be careful here on a PC that already boots Windows from another drive. Changing storage mode on a working Windows install can stop it starting, so note the original setting first.
Boot mode and CSM
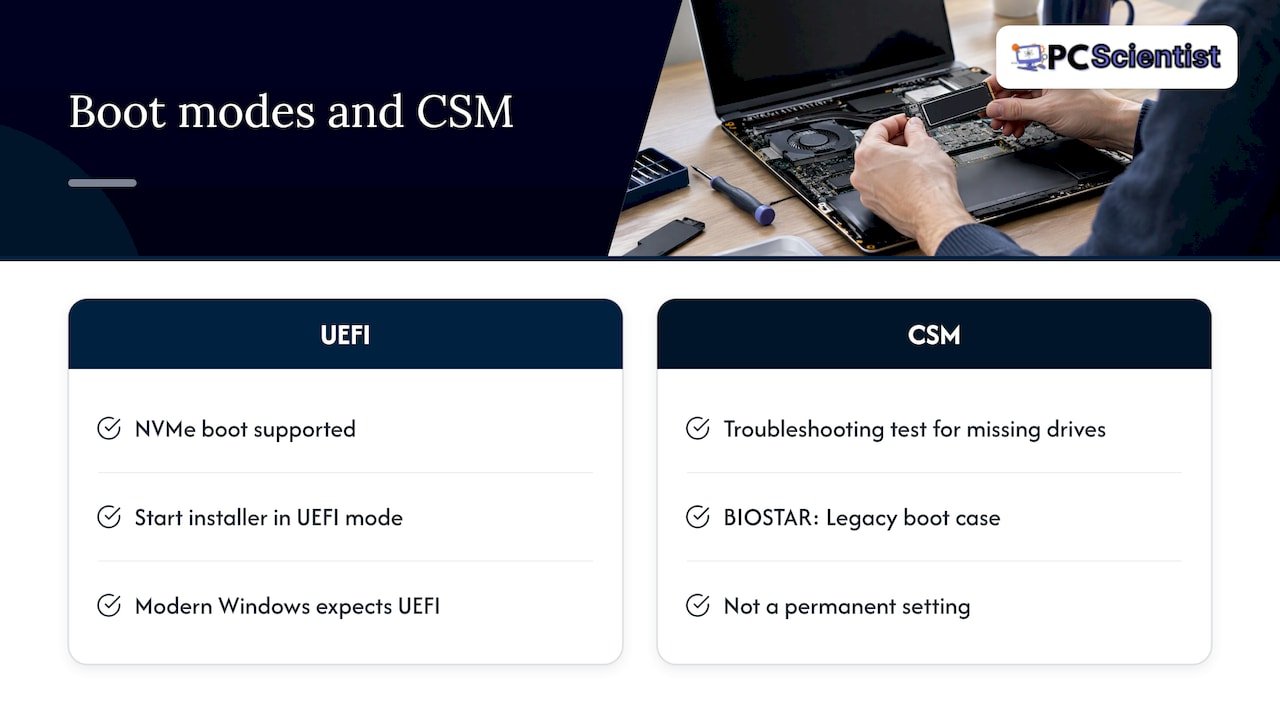
NVMe boot generally relies on UEFI. Intel's NVMe installation guide says booting from an NVMe PCIe SSD is supported only on UEFI systems, and the operating system installer should be started in UEFI mode, not legacy.
Compatibility Support Module (CSM) is a different story. Both ASUS (Boot, then Launch CSM) and BIOSTAR list enabling CSM as a troubleshooting step for missing drives, in BIOSTAR's case when the device is in Legacy boot mode. Treat it as a test, not a permanent setting, particularly if you're installing a modern version of Windows, which expects UEFI.
Back out overclocking
If you've set CPU or memory overclocking, unstable settings can stop drives being detected, according to ASUS's troubleshooting page. Load the BIOS default settings and test again.
New build? Check the boot order
For a brand-new build, Seagate says to enter BIOS setup during boot and make sure a PCIe device is set in the boot sequence, then fit the drive and secure it with its screw.
BIOS sees it, Windows doesn't
Good news: if the BIOS lists the drive, the hardware is almost certainly fine. The fix is usually a few clicks in Windows.
Right-click Start and open Disk Management. NZXT notes that a common reason a properly connected drive doesn't appear is that it hasn't been initialised, and that an Unallocated disk in Disk Management is the clue.
ASUS's Windows SSD guide sets out what to do in each state:
- Shows Offline: right-click the disk and choose Online.
- Online but no drive letter: use Change Drive Letter and Paths to assign one.
- Unallocated: only if you know the drive is empty, create a New Simple Volume.
That "only if you know it's empty" matters. If this drive used to hold your files, don't initialise or create a volume. Read the next section first.
In Device Manager, ASUS also suggests enabling the disk if it's disabled, or uninstalling its driver and restarting so Windows reinstalls it. Samsung adds that you may need to scan for hardware changes in Device Manager, and that very old Windows 7 installs without NVMe drivers may not recognise NVMe drives at all.
If Windows misbehaves more broadly while you work through this, such as black screens after driver changes, these safe Windows black screen fixes are a sensible thing to try before a repair. And if the PC won't start Windows at all after you've changed BIOS settings, our Windows won't boot fix order guide covers what to check first.
When to stop and get the drive checked
This is where people lose data. Stop testing straight away if:
- The SSD appears and then disappears.
- It shows as 0 GB or a wrong size.
- It flips to read-only.
- The computer freezes when the drive is connected.
In any of those cases, don't initialise, format, create a new volume or run "repair partition" tools, and avoid long surface scans on a drive that keeps disconnecting. Each of those actions writes to a drive that may be failing, and SSDs are unforgiving. Our guide on SSD data recovery and TRIM explains why time matters: on a working SSD, deleted data can be cleared within minutes.
If the drive is your only copy of photos, work files or business records, power the machine down and call someone before you try anything else. A drive that's merely misconfigured costs you nothing to wait on. A drive that's failing may not give you a second chance.
Our perspective
Most of the "my SSD is dead" calls we get turn out to be something much smaller: a drive sitting a few degrees off its connector, an NVMe drive in a SATA-only slot, or a brand-new drive nobody has initialised. That's good news, and it's why we start with the simple checks in a fixed order.
The ones that worry us are the people who've already formatted or initialised a drive while hunting for a fix. It's an understandable reflex, and it's the step that makes recovery hardest. If there's anything on that drive you'd miss, pause and ask for help before you do anything that writes to it.
We'd rather you didn't need to know what a lane, a key or a CSM is. Tell us what you see on screen, and we'll work through it with you in plain language, onsite or remotely, depending on what suits. Our repairs are no fix, no fee, and we aim to give you clear pricing up front.
PC Scientist
Need a hand with it?
If you've been through the checks above and the drive still won't show, or you'd simply rather not open your PC, we can help. Our Computer Repair Scientist service covers diagnosing drives, slots and settings across NSW, and we can look at several devices in one visit. If the drive holds files you need, our Data Recovery Scientist service is the careful route: we'd rather look at the drive before anything is formatted.

You don't need to know the technical term for what's wrong. Tell us what you see, and we'll take it from there. Start at pcscientist.com, or see all our technology services.
If the machine won't power on at all, start with what to check when a laptop won't turn on. And if you've just bought the drive to speed up an old computer, why an SSD upgrade makes a PC feel faster is a good read while you wait for the fix.
A quick checklist you can follow in order
- Note where the drive is missing: BIOS, Windows or both.
- Check the slot supports your drive type (NVMe or SATA) and the drive's length.
- Power down, unplug, reseat the drive and lock the screw.
- Check for a shared SATA port that disables the M.2 slot.
- Try another M.2 slot, or test the drive in another computer.
- Load BIOS defaults, remove overclocking, and update the BIOS.
- Check AHCI mode and, as a test only, CSM.
- In Windows, use Disk Management: Online, initialise a new drive, assign a letter, create a volume only on an empty drive.
- If the drive vanishes, shows 0 GB or goes read-only, stop and get it checked.
Sources
- Dell: NVMe SSD guide, sizes, setup, troubleshooting and FAQs
- ASUS Australia: Cannot find the hard disk drive or SSD (M.2)
- ASUS: Troubleshooting Solid State Drive (SSD) in Windows
- Intel: Unable to detect NVMe M.2 storage devices in BIOS
- Intel: SSD 6 Series for PCIe with NVMe installation guide
- Samsung Semiconductor: Internal SSD troubleshooting
- NZXT Support: My storage is not detected
- BIOSTAR support FAQ: M.2 SSD not detected
- Seagate: How to install and format your M.2 NVMe SSD
- HP: How to choose the right SSD
- Windows black screen safe fixes
Recommended
- SSD Data Recovery: TRIM Can Wipe Deleted Data Within Minutes
- Windows won't boot? Try this fix order first
- SSD Upgrades: Home and Small Business PCs Feel Faster in a Minute
- Laptop won't turn on? Here's what to check first
Frequently Asked Questions
Straight answers about M.2 SSD Not Detected? How to Fix It Step by Step - without jargon or pressure. Call 0493 563 381 for advice, or get help below.
Want the quickest answer? 0493 563 381 for free advice.
The usual suspects are a drive that isn't fully seated, a slot that only supports SATA, an M.2 slot disabled because it shares lanes with another port, or an outdated BIOS. Reseat the drive, check your motherboard manual for what each slot supports, and update the BIOS from the maker's official site.
A new drive is blank, so Windows won't list it in File Explorer until it's initialised and has a volume. Open Disk Management, bring it Online if needed, initialise it, and create a New Simple Volume. Only do this if you know the drive is empty.
Two motherboard makers list CSM as a troubleshooting step for missing drives, so it's reasonable as a short test. NVMe booting generally relies on UEFI, though, so turn it back off if it makes no difference, particularly for a modern Windows install.
Reseating the drive and checking BIOS settings doesn't touch your files. Initialising, formatting or creating volumes does, so avoid those on any drive that held data. If the drive keeps disappearing, switch the machine off and get it checked.
Computer repair across NSW
Still stuck with an M.2 SSD that isn't detected?
If the steps above did not get the repair sorted, that is okay. Get help in your area and we will take it from here.
Start here
Get computer repair
Optional Need a Sydney city or region?
Choose a side of Sydney
These are Sydney cities and regions, such as the Northern Beaches or Inner West. First tap a side of Sydney. Then open the city or region that covers you.
C Sydney City / Inner 3 areas
N Northern Sydney 5 areas
NW North-West / Central Sydney 3 areas
W Western Sydney 1 area
SW South-West Sydney 3 areas
S Southern Sydney 2 areas
Optional Find your suburb
Type a suburb from our listed coverage. This opens the matching city or region page for this topic. Listed suburb pages are general technology services, not this specialist page.
If your suburb is not listed, use the city or region list above, or call 0493 563 381.
Disclaimer
The information in this article is provided for general educational and informational purposes only. While PC Scientist strives to keep all content accurate and up to date, technology issues can vary depending on your device, software, network configuration, and individual circumstances. Always back up important data before attempting repairs or system changes. If you are unsure or the issue cannot be resolved safely, contact PC Scientist today for professional onsite or remote IT support. PC Scientist is not liable for any loss of data, damage, or other issues resulting from the use of the information provided in this article.