

Security camera placement: where every camera should go
Cover your entry points before anything else. The front door, driveway, side paths and rear entry are where nearly every intrusion starts, so those four zones get first call on your cameras. The rule that guides everything else: think in terms of detection, then recognition, then identification. A camera that only detects movement is little better than a porch light with a sensor. One that lets you positively identify a face or a numberplate is the one that actually helps police or insurers act.
- Front door/porch - captures visitors, deliveries, and anyone approaching your main entry
- Driveway/garage - covers vehicle movement and the most common forced-entry point
- Side paths - closes off the blind spot most homeowners forget
- Rear entry - protects the point burglars actually prefer, since it is hidden from the street
One legal note before you mount anything: video and audio are judged very differently under Australian law, and a camera that's fine for footage can still land you in trouble if its microphone picks up a private conversation next door.
Key Takeaways
Effective security camera placement prioritises entry points first and mounts each camera at a height and angle that supports identification, not just deterrence.
| Point | Details |
|---|---|
| Cover entry points first | Front door, driveway, side paths and rear entry capture the most likely approach routes. |
| Mount at the right height | Fixed cameras sit at 2.5 to 3.0 metres; video doorbells work best at 1.2 to 1.3 metres. |
| Plan for three to six cameras | Most homes reach solid coverage with this range, added in priority order as budget allows. |
| Separate video and audio legally | NSW judges optical devices by a trespass test; disable microphones near shared boundaries to reduce risk. |
| Get a professional site survey | PC Scientist assesses access points, Wi-Fi coverage and mounting angles before installing and testing your system. |
Table of Contents
- Best outdoor security camera placement for every entry point
- Which indoor security camera locations are worth it?
- How many security cameras does a typical home need?
- What height and angle capture the clearest footage?
- Common security camera placement mistakes and quick fixes
- Is it legal to point a security camera at your neighbour?
- PC Scientist's on-site checklist for getting placement right the first time
- Why identification should always beat deterrence
- Get your placement right with a professional site survey
- Sources
- FAQ
Best outdoor security camera placement for every entry point
Outdoor placement is where most of your coverage budget should go, because it's where intruders make their first move and where good footage actually gets used by police.
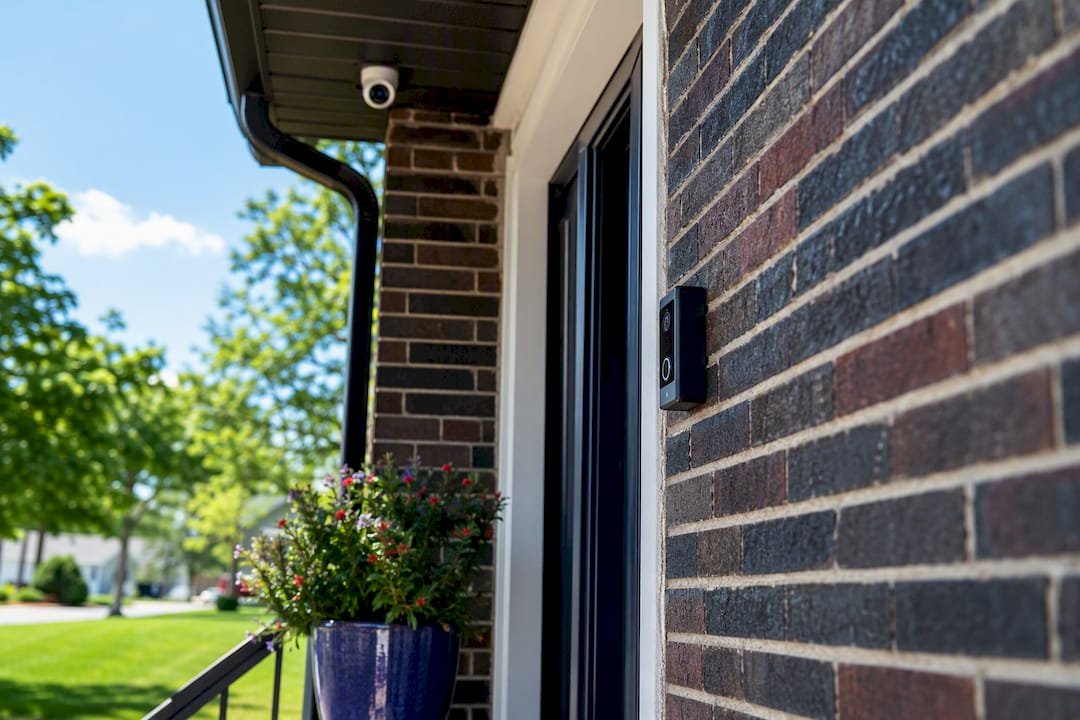
Front door. A video doorbell and a fixed under-eaves camera solve two different problems. The doorbell sits low, around waist height, framing faces well for anyone who walks up and knocks. The eaves-mounted camera sits higher and wider, watching the whole porch, parcels included. Running both isn't overkill. A two-angle setup at the front door gives you identification and package protection without much extra cost.
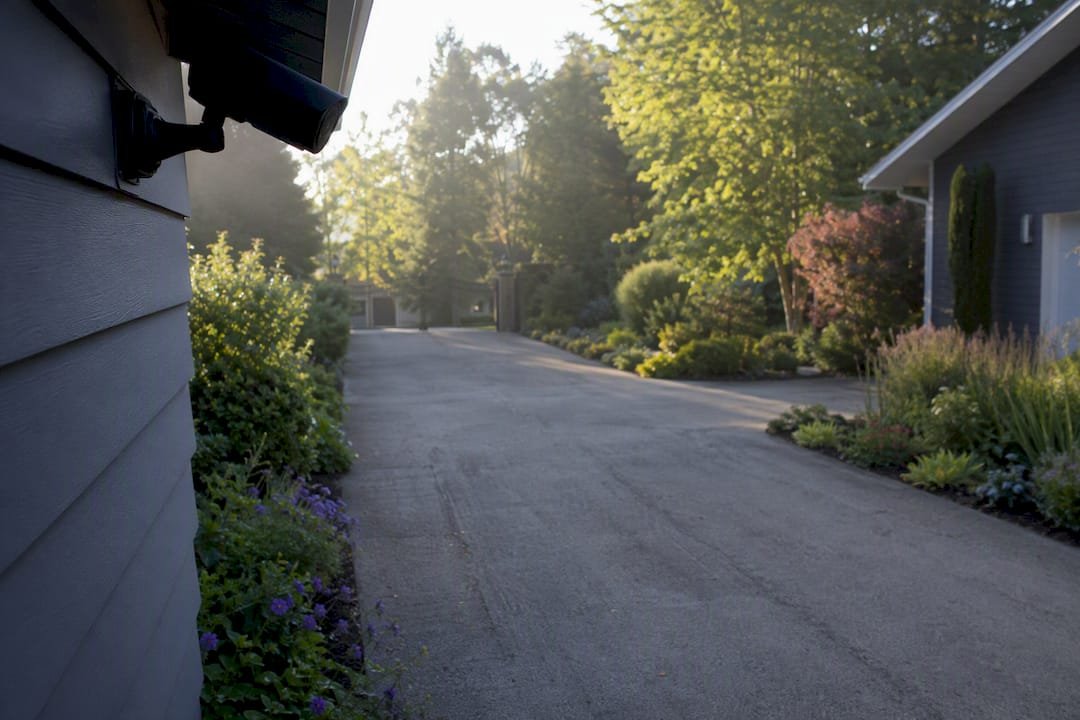
Driveway. One overview camera mounted at a corner of the house, angled down the length of the drive, covers vehicle movement and general activity. If plate capture matters to you, a wide shot usually won't cut it at distance. A second, narrower camera positioned closer to the street, with its shutter and infrared settings tuned for moving vehicles, does the job a general-purpose camera can't.
Side access. This is the spot homeowners skip and burglars love. A single camera covering the side path or gate closes off what's often the biggest blind spot on the entire block.
Garage and shed. Decide what you're protecting: the building itself, or what's inside it. External cameras on garages guard against forced entry. Internal cameras, aimed at tools, bikes, or stored valuables, matter more for standalone sheds that sit away from the house.
Backyard. Resist the urge to mount one camera far back and let it take in the whole yard. Wide, distant shots lose the detail that makes footage useful. Cover the pool gate or outbuilding directly if those need protecting, rather than relying on a single wide-angle camera to do everything.
- Start with front door and driveway.
- Add the side path camera next.
- Cover rear entry.
- Extend to garage, shed, and pool areas as budget allows.
Pro Tip: Before buying a second driveway camera for plate capture, walk the driveway yourself at the distance you'd expect a car to be, and check what a phone camera picks up. If you can't read a plate from that spot, your CCTV camera won't either.
Which indoor security camera locations are worth it?
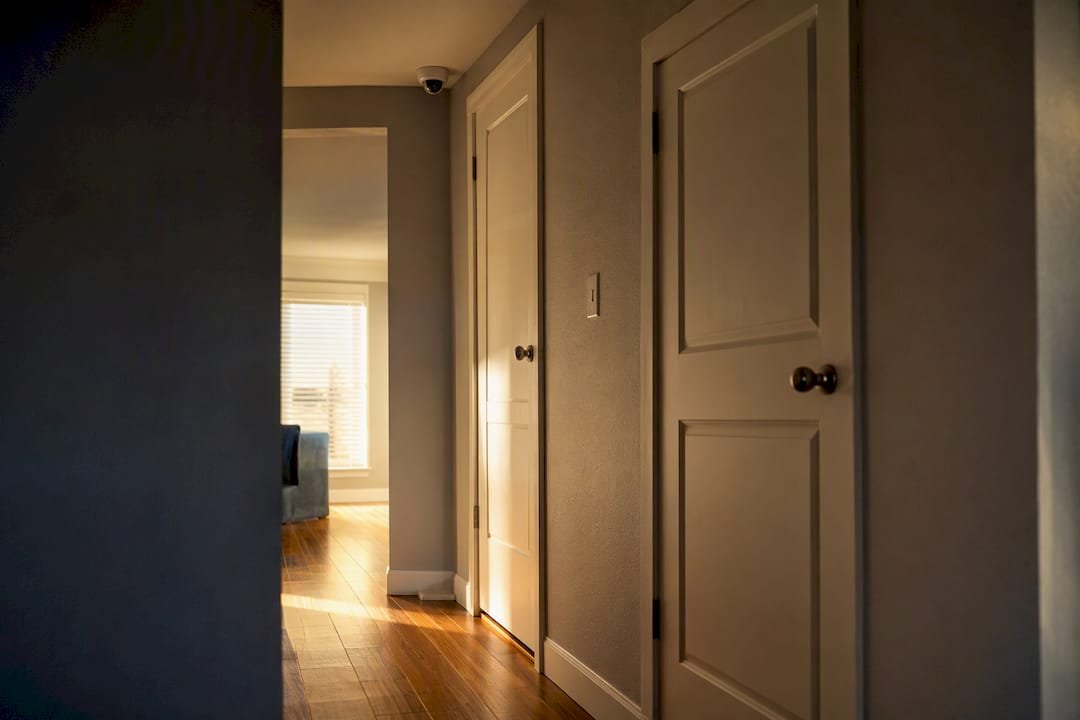
Indoor cameras earn their keep at transition points, not in every room. The goal indoors isn't blanket coverage, it's catching movement between the outside world and the parts of your home that matter most.
- Entry hall - confirms who came in and when, useful for insurance claims and family peace of mind
- Stairwell - a natural chokepoint in multi-storey homes
- Internal garage door - flags anyone who's gained access to the garage and is now trying the house itself
- Living-room transition points - doorways and hallways leading to bedrooms, rather than the living space itself
Bedrooms and bathrooms are off-limits, full stop. Beyond the obvious privacy concerns, if you're renting or living under a strata scheme, check your lease or by-laws before installing anything indoors. Some buildings restrict CCTV in common areas or facing shared spaces, and getting that wrong can create a dispute you didn't need.
Mount indoor cameras where they can't be easily knocked down or covered by anyone who does get inside. A camera positioned high in a hallway corner, out of easy reach, is far harder to disable than one perched on a shelf at eye level.
How many security cameras does a typical home need?
Most homes land somewhere between three and six cameras for solid coverage without significant gaps, according to eufy's placement guidance. That range isn't arbitrary. It reflects the number of genuine access points on an average block: front door, driveway, side path, and rear entry, with one or two extras for garages or outbuildings.
If budget or wiring is tight, prioritise in this order:
- Front entry, because it's where most visitors and most opportunists make contact first.
- Driveway and side path, since together they cover vehicle access and the most overlooked blind spot.
- Rear entry, the point burglars actually prefer since it's hidden from the street.
- Assets, meaning garages, sheds, and anything stored outside.
Add more cameras when your property has features that break the standard template. Long driveways often need a dedicated plate-capture camera on top of the overview shot. Separate structures like granny flats or detached garages need their own coverage rather than relying on the main house cameras to catch activity from a distance. Multiple street-facing access points, common on corner blocks, usually mean four cameras isn't enough.
What height and angle capture the clearest footage?
Height decides whether your footage is useful or just decorative. Mount too high and you get a clear view of the top of everyone's head, which is useless for identification.
- Outdoor fixed cameras: 2.5 to 3.0 metres, tilted down between 15 and 45 degrees
- Video doorbells: 1.2 to 1.3 metres, framing faces at a natural angle rather than looking down on foreheads
- Wide lenses suit overview shots of driveways and yards; narrower lenses suit chokepoints where you need to identify a specific face or plate
The trade-off is real: a wider field of view covers more ground but sacrifices the detail needed to identify someone in court or to an insurer. A narrower lens gets you that detail but leaves gaps either side.
Test what you've mounted before calling the job done. Walk the approach path yourself during the day and at night, and check the live view on your phone at each point. If a face is unreadable from the spot where a visitor would actually stand, adjust the tilt or the height before you consider the install finished.
Common security camera placement mistakes and quick fixes
Most footage that turns out useless traces back to one of a handful of avoidable errors.
- Mounted too high, angled straight down. Common on front doors and garages. Fix it by lowering the mount or adding a second camera at a shallower angle.
- Obstructed by foliage, gutters, or overhangs. Bushes grow, and a clear shot in spring can be blocked by summer. Trim regularly or reposition the camera so growth doesn't silently kill your coverage.
- Facing directly into sunrise or sunset. Backlighting washes out faces into silhouettes. Reorient the camera or add a small shade hood.
- Constant false alerts from swaying trees or passing traffic. Adjust motion zones in the app, or shift the camera a few degrees so it's not staring straight at moving vegetation.
Pro Tip: Do your obstruction check twice a year, not once at install. A camera that had a clear line of sight in June can be half-blocked by a fence-line hedge by December.
Is it legal to point a security camera at your neighbour?
The short answer is that it depends on where you live and what the camera records, not just where it's pointed. In New South Wales, optical surveillance is judged by a trespass test under the Surveillance Devices Act 2007. A camera on your own property that doesn't require entry onto your neighbour's land to install or operate generally sits outside that section, even if it happens to catch part of their yard in frame. Other states, including Victoria and Western Australia, apply a broader "private activity" test that can capture more scenarios.
Audio is a different story entirely. Listening devices are governed separately, and a camera that's perfectly lawful for video can still breach the rules if its microphone picks up a private conversation it wasn't meant to hear.
If in doubt, disable the microphone on any camera near a shared fence line. You keep the video evidence that actually matters for security, and you remove the part of the setup most likely to cause a dispute.
Practical steps that head off most problems before they start:
- Angle cameras inward toward your own property rather than out toward a neighbour's yard
- Put up visible signage, which the OAIC recommends as good practice even where it's not strictly required
- Talk to your neighbour before installing anything that might catch their space
- Check council rules and strata by-laws if you're in an apartment or townhouse
If a dispute does arise, the OAIC's own guidance points first to mediation rather than escalation, with police involvement reserved for genuine harassment or stalking concerns.
our on-site checklist for getting placement right the first time
A proper site survey takes the guesswork out of where cameras actually belong on your block, and it's usually a short walk that saves a lot of rework later.
- Walk the full perimeter and note every access point, including gates that don't get used often.
- Check for obstructions and lighting conditions after dark, not just in daylight.
- Map where Wi-Fi signal drops off, since a camera with a weak connection is a camera that misses footage when it matters.
- Flag any spot needing Power over Ethernet cabling rather than relying on Wi-Fi alone.
The problems PC Scientist sees most often on residential jobs are Wi-Fi dead zones at the back of the property, PoE cabling run incorrectly through walls, and cameras mounted at angles that looked fine from the ladder but miss the actual approach path. Complex blocks, commercial properties, and strata buildings with shared access usually warrant a proper site survey rather than a DIY guess.
Why identification should always beat deterrence
Most advice on this topic stops at "put a camera by the door and call it done." That's not wrong, exactly, but it misses the point of what a camera is actually for. A camera that only deters is a camera that failed the moment someone decided to try anyway. What matters is whether the footage that camera captures can identify who did it.
That changes how you should think about mounting height, lens choice, and even which zones get a camera first. A wide-angle shot from 3.5 metres up looks impressive on a sales brochure and useless in an insurance claim. The homeowners who get real value from their systems are the ones who treat every mount as a trade-off between coverage and clarity, and who choose clarity at the points that matter most.
The other gap in conventional advice is legal nuance. Most guides treat CCTV as a single legal question. It isn't. Video and audio sit under different tests in New South Wales, and treating them as one thing is how well-meaning homeowners end up with a system that's technically compliant on the video side and a liability on the audio side. Sort out your microphone settings before you sort out your camera count.
- PC Scientist
Get your placement right with a professional site survey
There's a real difference between a camera that's simply mounted and one that's placed with intent. PC Scientist runs CCTV site surveys across the Central Coast, Sydney Metropolitan area, Wollongong, Newcastle, Lake Macquarie, the Hills District, Northern Beaches, Upper North Shore, Mittagong, and the Southern Highlands, and every visit follows the same logic covered above: walk the property, identify genuine access points, check lighting and Wi-Fi coverage, then recommend mounts that actually deliver identification, not just detection.

A typical visit includes an on-site assessment, a straightforward quote, a recommended placement plan for each camera, and full installation and testing before we leave. For homes with tricky wiring, dead Wi-Fi zones, or strata considerations, that's the difference between footage you can actually use and footage that just looks reassuring on a screen. If your property runs a broader network setup, our business and venue CCTV service covers integration with existing alarms and access systems too.
Book a site survey and we'll walk your property with you, point out the gaps in your current coverage, and give you a clear plan before any drilling starts.
Sources
- Best places to place home security cameras - eufy Australia
- Surveillance Devices Act 2007 (NSW)
- At what height should CCTV cameras be installed for optimal performance? - Security Australia
- Security cameras - Office of the Australian Information Commissioner
Recommended
- Business & Venue CCTV NSW | PC Scientist
- Security Camera Scientist | CCTV & Site Surveys NSW | PC Scientist
- Tech for Professional Offices | PC Scientist
- Hotel, Motel, Airbnb & Strata Tech | PC Scientist
Frequently Asked Questions
Straight answers about Security camera placement: where every camera should go - without jargon or pressure. Call 0493 563 381 for advice, or get help below.
Want the quickest answer? 0493 563 381 for free advice.
Focus on the front door, driveway, side access paths, and rear entry first, since these cover the routes most intruders actually use to approach a property.
In New South Wales, a camera on your neighbour's own property is generally lawful under the trespass-based test in the Surveillance Devices Act, even if your yard appears in frame, though audio recording is judged separately and more strictly.
Avoid bedrooms, bathrooms, and any space where privacy is expected, and check strata or lease conditions before installing indoor cameras in shared or rented properties.
The best position covers a genuine access point at a height of roughly 2.5 to 3.0 metres for fixed cameras, or 1.2 to 1.3 metres for video doorbells, angled to capture faces rather than the tops of heads.
Most homes achieve solid coverage with three to six cameras, prioritising front entry, driveway, side path, and rear access before adding extras for garages or outbuildings.
CCTV help across NSW
Want to talk through security camera placement?
If you would rather not plan cameras on your own, get help in your area. We will talk it through first.
Start here
Get CCTV help
Optional Need a Sydney city or region?
Choose a side of Sydney
These are Sydney cities and regions, such as the Northern Beaches or Inner West. First tap a side of Sydney. Then open the city or region that covers you.
C Sydney City / Inner 3 areas
N Northern Sydney 6 areas
NW North-West / Central Sydney 3 areas
W Western Sydney 1 area
SW South-West Sydney 3 areas
S Southern Sydney 2 areas
Optional Find your suburb
Type a suburb from our listed coverage. This opens the matching city or region page for this topic. Listed suburb pages are general technology services, not this specialist page.
If your suburb is not listed, use the city or region list above, or call 0493 563 381.
Disclaimer
The information in this article is provided for general educational and informational purposes only. While PC Scientist strives to keep all content accurate and up to date, technology issues can vary depending on your device, software, network configuration, and individual circumstances. Always back up important data before attempting repairs or system changes. If you are unsure or the issue cannot be resolved safely, contact PC Scientist today for professional onsite or remote IT support. PC Scientist is not liable for any loss of data, damage, or other issues resulting from the use of the information provided in this article.
